Search guide
TextSeek provides two modes to search: Zone mode and Easy mode. You can switch the mode by clicking the tab button in the top right.
Zone mode is used for searching fixed common folders and is suitable for long-term usage. In this mode, the documents in the zones will be scanned in advance, so the search will be quick, and all the search results will be complete.
Easy mode is used for out-of-zone folders or frequently-changed search scope. This is the temporary usage mode. In this mode, the documents are not scanned until you click the search button, so the search is slower; and it will show the search results as soon as a new result is found. The searching will proceed until you click the stop button or all the documents in the target folder have been scanned.
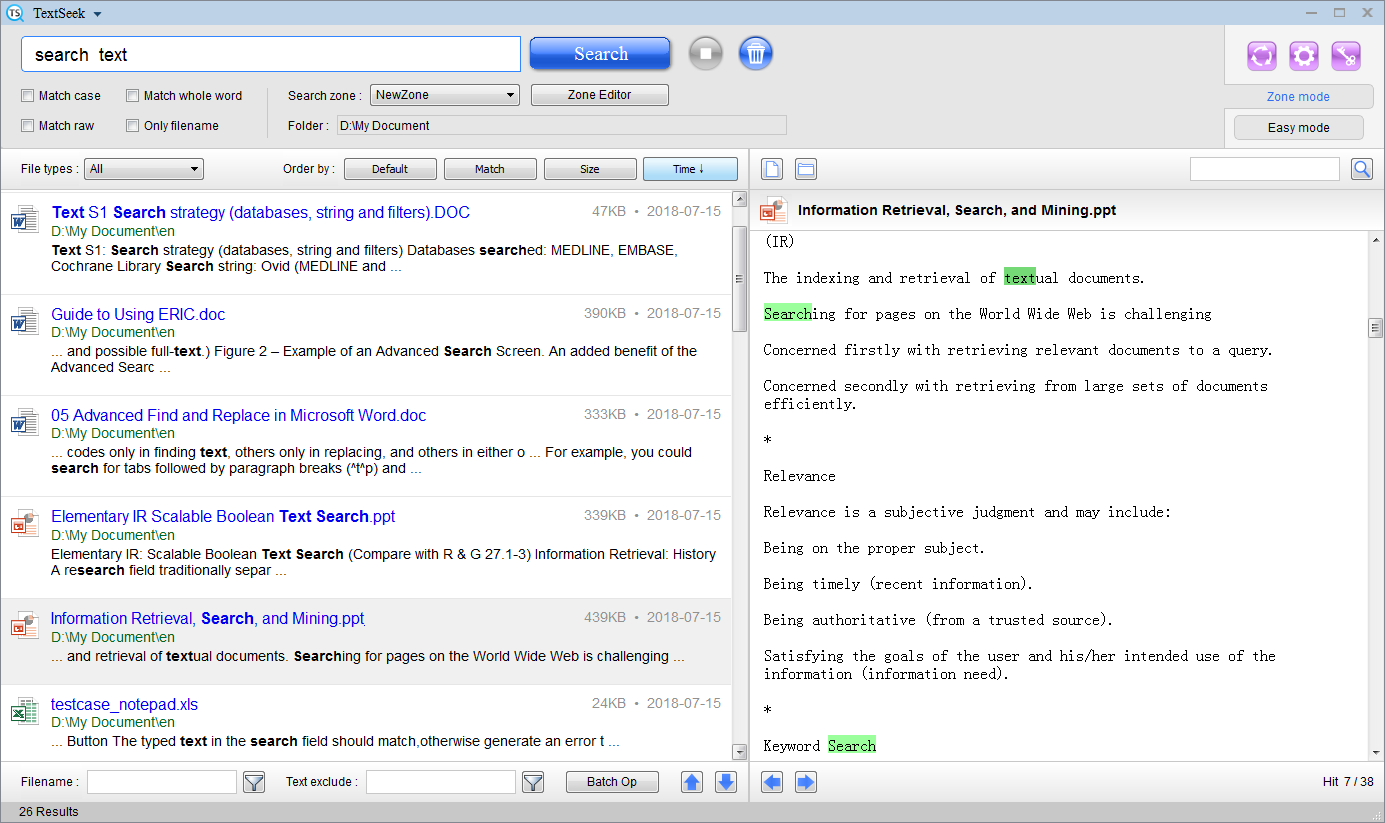
Let's introduce easy mode first. In this mode, you can only search a single folder. You need to set the target folder first, and if you haven't set it, a dialog box will pop up to let you choose the folder to search. In the big search box at the top of the main interface, enter the search terms (separate words with spaces) and click "Search", the search results are as follows:
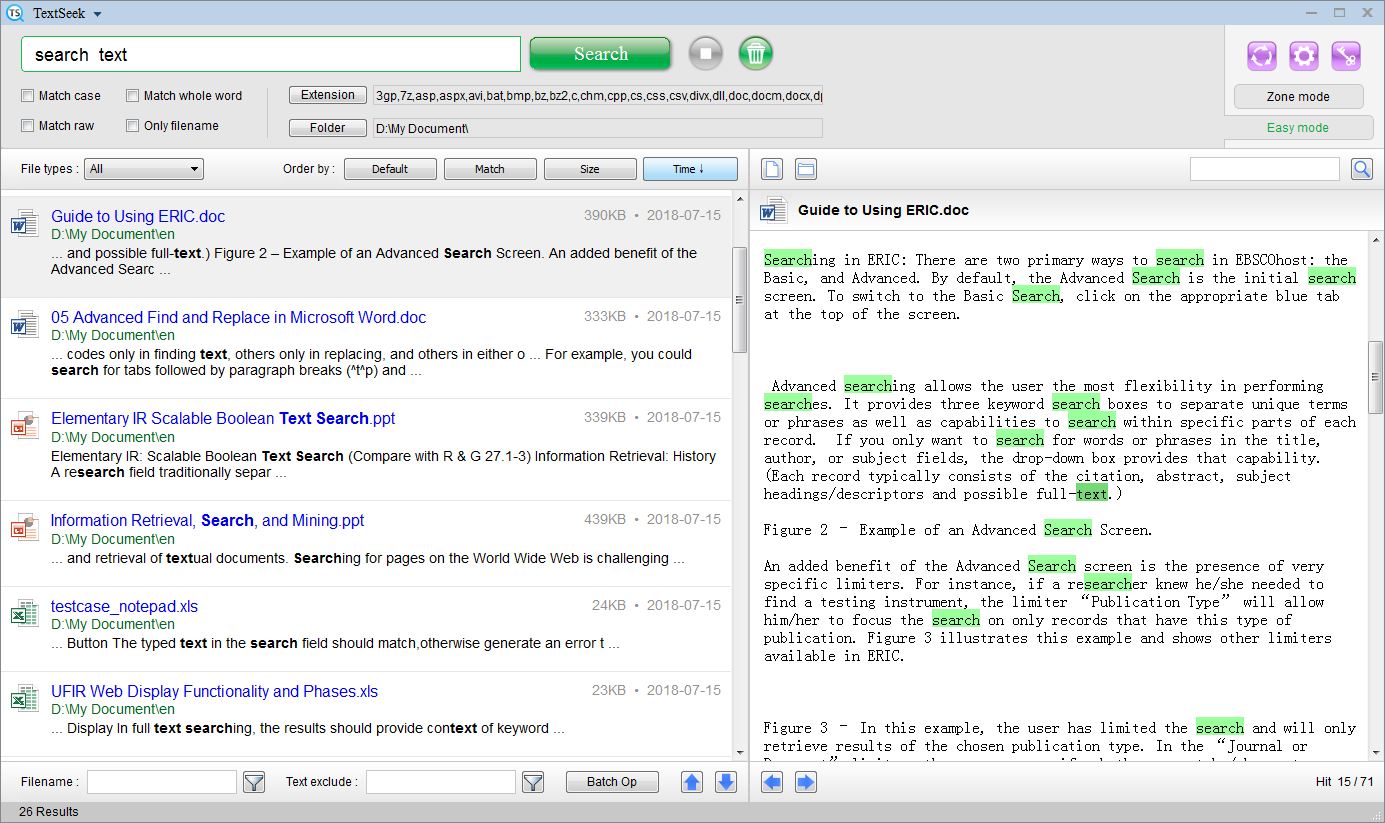
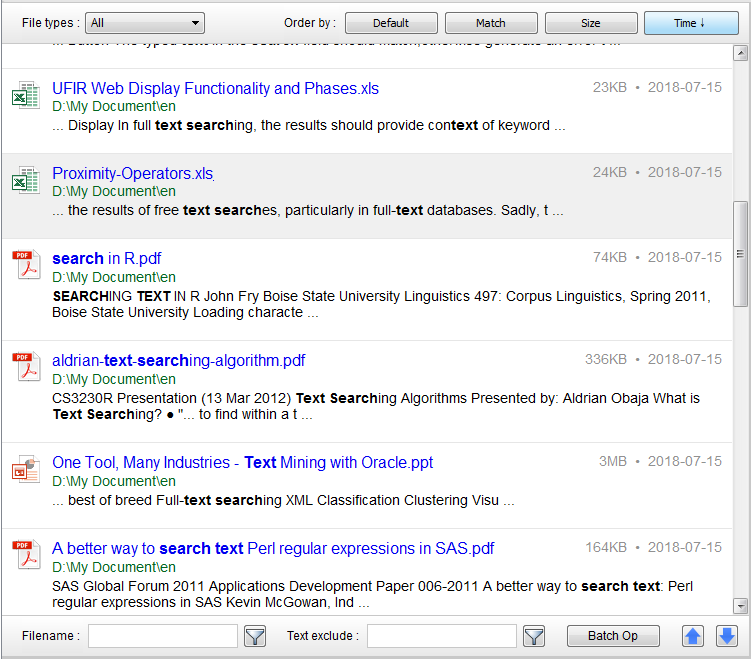
On the left side it is search result area. Each block stands for one file with keyword. You can single-click a result link to show a document preview on the right side or double-click a result link to open the document. There are multiple tools on the top and bottom part of search result area to operate with the results :
They are preview area in the right bottom part. There are two buttons in the left-top corner of preview area, to open file or corresponding folder respectively; the search bar in the right-top corner, is used to locate other keyword in the preview window; the Left arrow and Right arrow in the left-bottom corner, is used to browse the hit keyword; the words in the right-bottom corner stands for the order number of hitting. To quickly browse over the search result and hit situation, you can use Ctrl+Arrow keyboard shortcut to achieve.
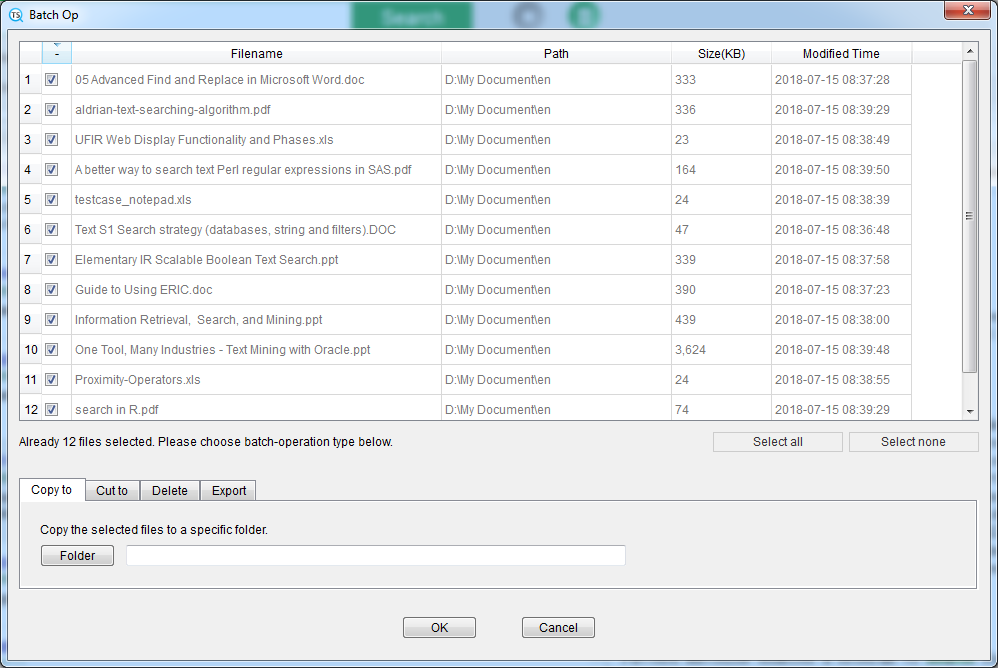
After searching, if there are some search results, click the "Batch Op" button to batch process all search results that meet the conditions. In the pop-up window, you can copy and cut all relevant files to the specified directory, or delete all of them, or export all search result information.
They are search options under the search bar. TextSeek performs a character-by-character search, so you can search "fi" to match "refined". If you want to search for documents where multiple words appear at the same time, please separate them with spaces; if you want to search for any occurrence of multiple words, please separate them with the keyword "or"; if you want to search for regular expressions, please use the keyword "re:" at the beginning (click here to learn more); If you want to search for documents that begin with specific characters, start with the keyword "pr:" ; if you want to search for a phrase composed of more than two words, you can use quotation marks (for example, "go to"). If you want to search by whole word, just select "match whole word". If you want to match the original text(like spaces or quotes), just select "match raw", the same as you search in Notepad. If you want to only match filename, just select "match filename". The "Extension" and "Folder" buttons on the right allow you to further customize the search for the specified extension and search path.

If you think the search results are enough, click the left round button to stop searching. If you want to clear the search results, click the right round button.
Switch to zone mode by clicking the "Zone mode" tab in the right, and you can see the search style become bluen.
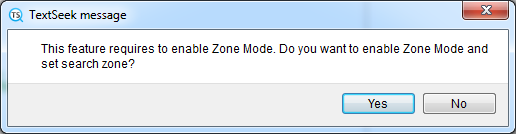
If you enter zone mode for the first time, you need to initialize the zone mode, the following dialog box will pop up, click "Yes" to enter the wizard pages.
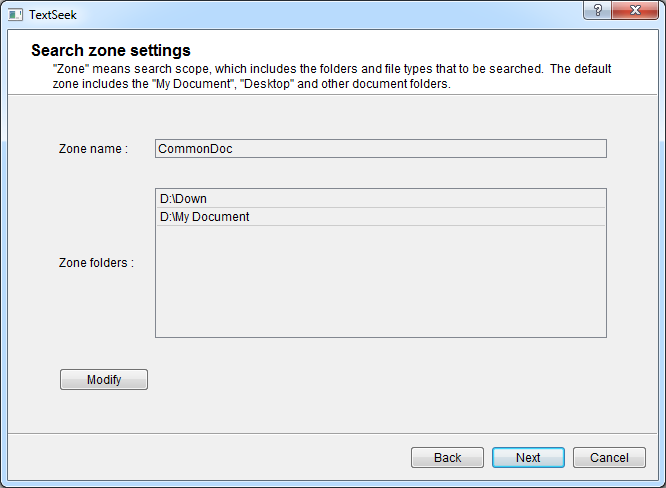
Zone means search scope, which includes the folders and file types to be searched. TextSeek intelligently sets a default zone for you. If you want to change the zone, click "Edit" (click here to see more). To confirm the zone, click "Next".
Then TextSeek start to scan the zone (which you set up in the last step) to gather file content. After several minutes, the "Finish" button will become clickable. Click it to end wizard pages.
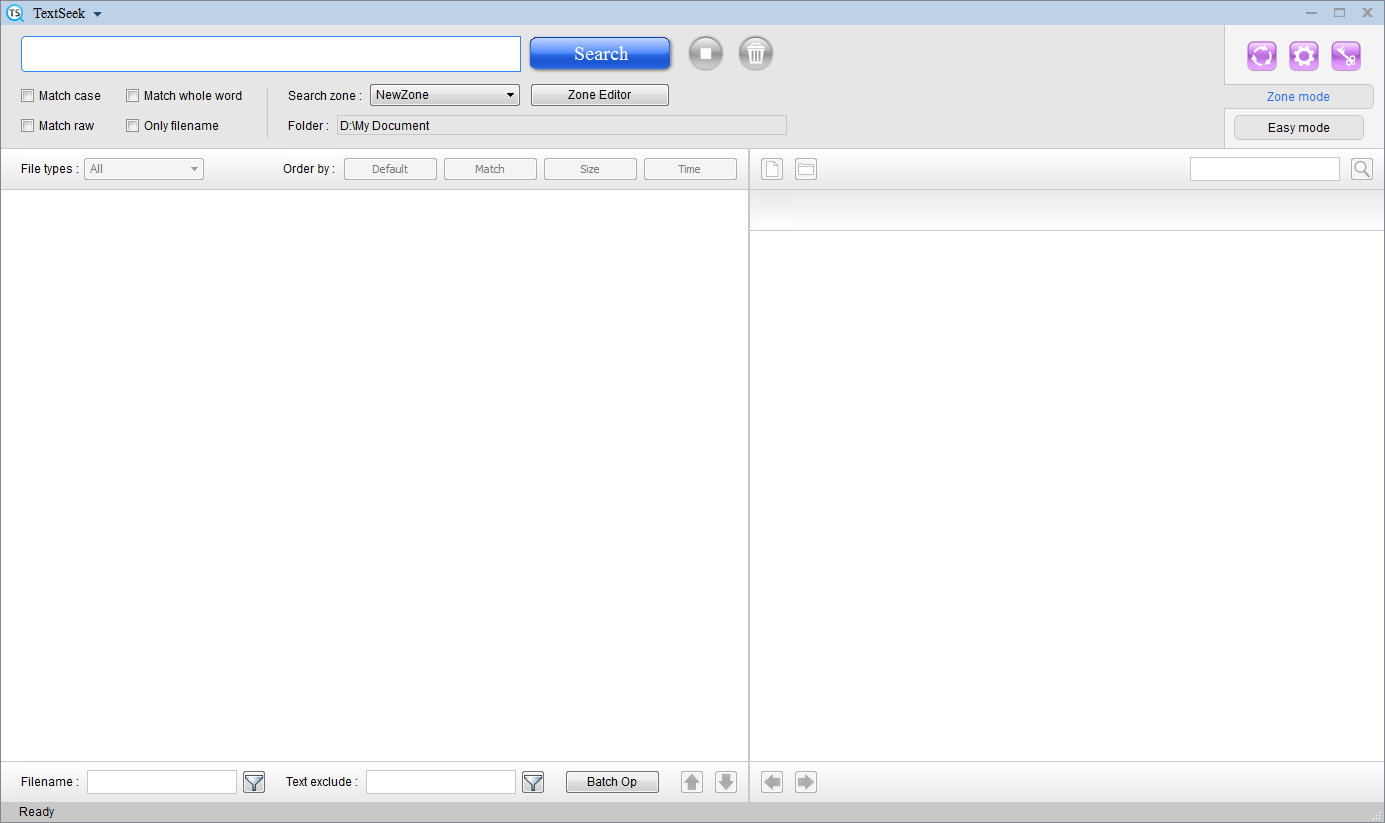
After wizard pages, TextSeek’s main interface will be shown like below: