Advanced feature guide
In the advanced search guide, it mainly introduces the zone configuration (zone mode) and software settings. Let's first look at the interface of the zone mode.
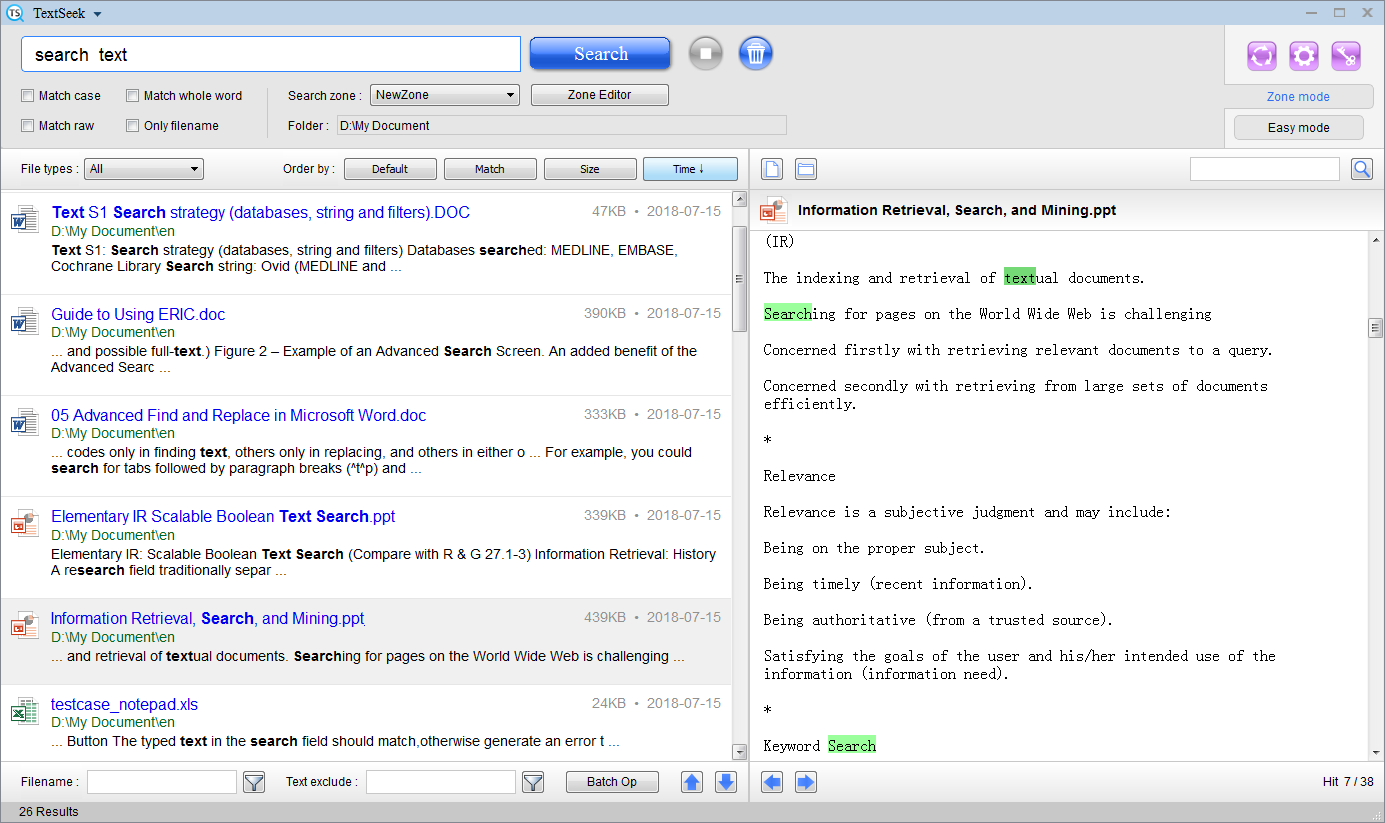
In the zone mode, there is an "Zone Editor" button below search bar. Open the "Zone editor" window, all the zone information is included in the big table with one line per zone (the default line is the zone you set on the wizard page). You can click "Edit" to modify the zone or "Add" to append a new zone. Once zones are set up, click "Save" to perform scanning over zones.
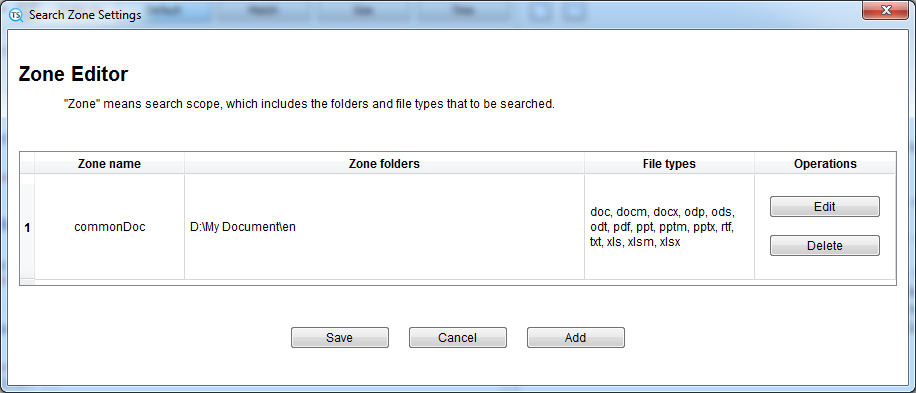
Here is the setting page for one zone. You can assign a zone name and check the folders and file types to be searched (you can click "Show hidden folders" to show all folders). Multiple folders are allowed to be checked here, and there is an "Auto select" button on the right that can also help you intelligently check some frequently used folders. If the file types you need are not on the list, click "Advanced" for further manipulation.
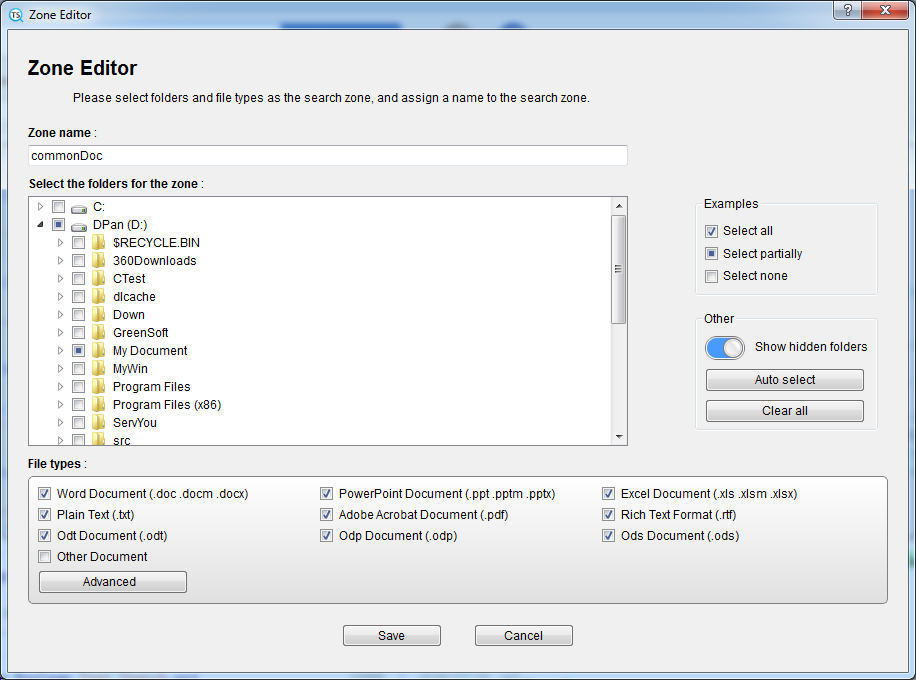
For the advanced settings page for file types, the top table is the file extension table, and one line means one kind of file extension. Just click one line and choose the scan scope ("only filename" or "filename and file content"). Below you can add new extension file types. Just key in the postfix of the file name and press the "Add" button. The files of user-add type will be parsed as a raw text file. Then click "Save" to keep the changes for file types.
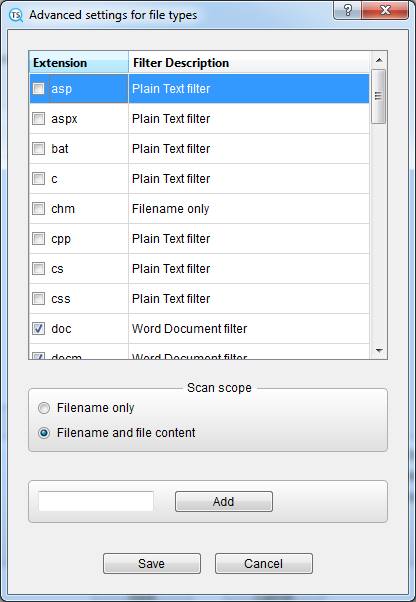
There are three buttons on the right-top of TextSeek, which are used for "Quick scan", "Settings," and "Register", respectively. Among them, "Quick Scan" is only applicable to zone mode. If you haven't opened TextSeek for a long time, the pre-scanned content may be out of date. Click this button to quickly scan it again.
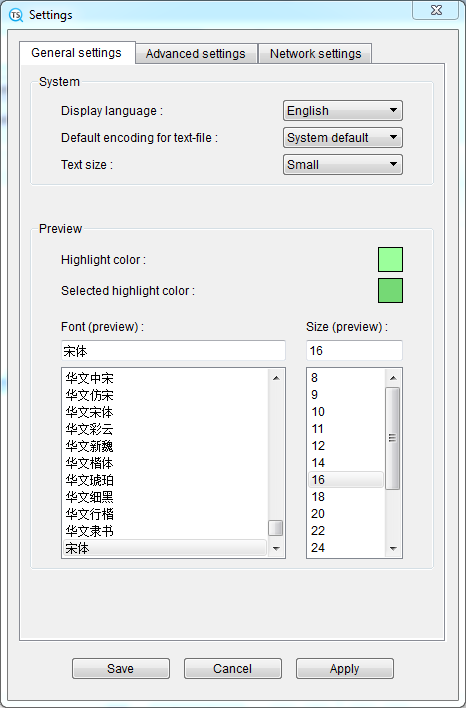
Here is the "Settings" window. The first tab page is "General settings", and you can set the display language and the default encoding (for parsing a text file that cannot detect encoding). Below you can set the highlight color for the preview window. At the bottom, the font type and font size for the preview can be changed.
The second tab page is "Advanced settings".
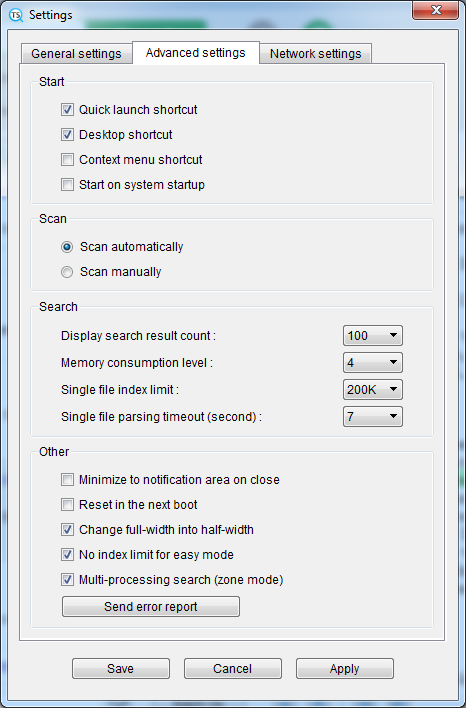
1. In the "Boot" section, you can enable the desktop-shortcut, quick launch shortcut, right-click menu, or automatic startup to trigger TextSeek;
2. In the "Scan" section, you can decide whether the file content is updated automatically or manually;
3. In the "Search" section, you can:
4. In the "Other" section, you can:
5. Finally, when you encounter a TextSeek crash, you can click the "Send error report" button” to send us an error report, which helps us find the root cause of the crash.
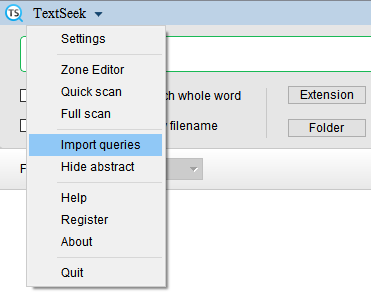
Click "TextSeek" on the top, you can see the menu popup, there are two new features here: import search queries, hide/show abstract. The former can select a query file and read it directly as the query in software. If the file has multiple lines, the software will use "or" to separate the words in each line. For extremely long queries that are frequently used, the feature can improve efficiency.
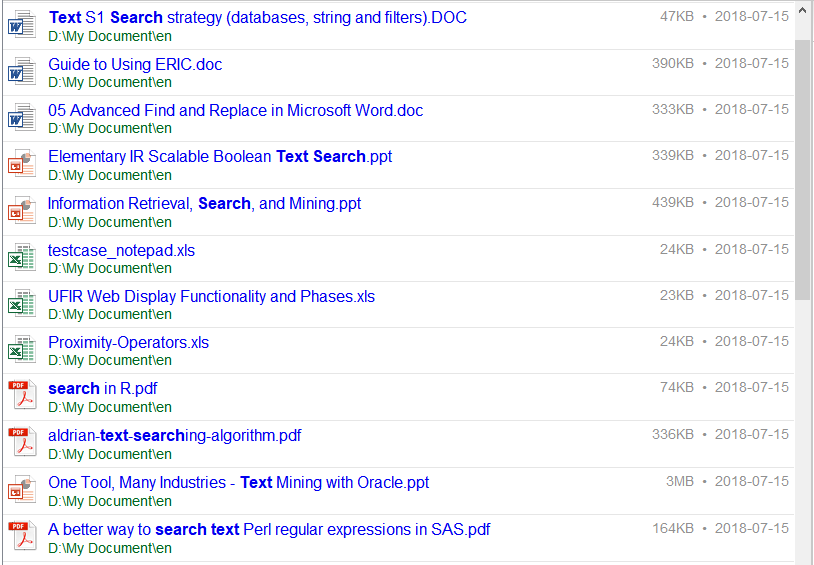
When you want to show more results, you can try "hide/show abstract" feature. After switching and searching again, the abstract information in the search results will be hidden, so that more results can be displayed on each page. If you want to restore the abstract information, click "show abstract".
Grammar of regular expressions
To search for regular expressions, you must enter the keyword "re:" in the search box as the beginning. For example, "re:\w+@gmail.com" can match all gmail addresses. The regular expression syntax of TextSeek is the same as that of python, as follows:
[] ---- Used to match a specified character category, where the words at the beginning of ^ represent the inverted set.
. ---- Match any character except newline
? ---- Repeat 0 to 1 times for the previous character
* ---- Repeat 0 to infinite times for the previous character
+ ---- Repeat 1 to infinite times for the previous character
{m} ---- Repeat m times for the previous character
{m,n} ---- Repeat m to n times for the previous character
\d ---- Match numbers, equivalent to [0-9]
\D ---- Match any non-digit character, equivalent to [^0-9]
\s ---- Match any white space
\S ---- Match any non-whitespace character
\w ---- Match any alphanumeric character, equivalent to [a-zA-Z0-9_]
\W ---- Match any non-alphanumeric character, equivalent to [^a-zA-Z0-9_]
| ---- Branch, match one from multiple options
() ---- Extract group. If a group is matched, TextSeek will hit the first group
\X ---- Escape character, used to match special characters, such as \\, \[, \], \?, \*, \+, \n, \uAB34, etc.
